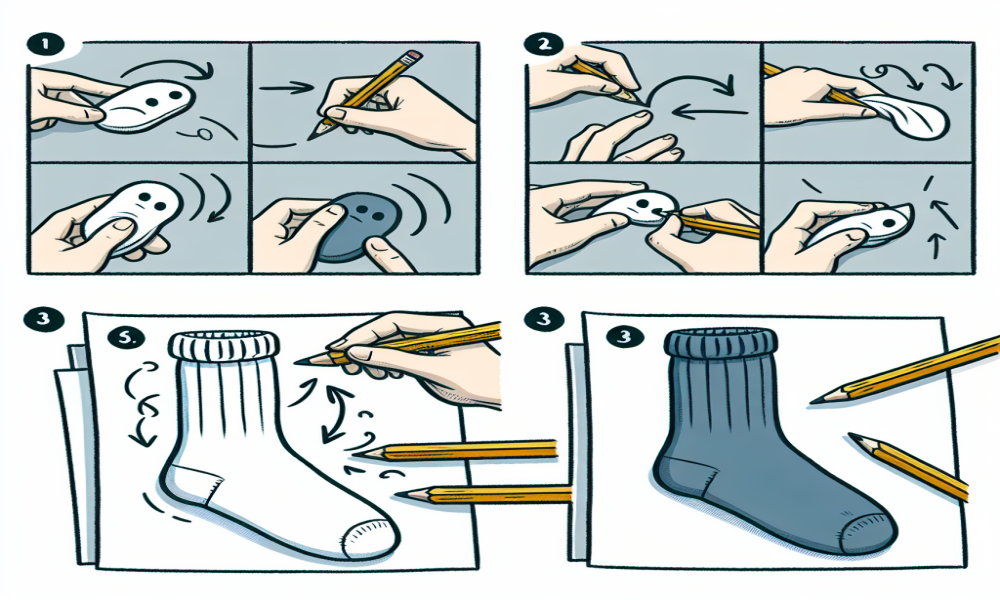
Drawing might seem intimidating at first, especially when tackling something as seemingly simple as a sock. But imagine turning a basic sock sketch into a piece of art that truly stands out. Whether you’re a beginner eager to pick up your first pencil or an experienced artist looking to refine your skills, this guide is tailored just for you. You’ll discover that with the right approach and materials, drawing socks can be both fun and rewarding. From understanding the essential tools to mastering the intricate details, we’ll walk you through each step, ensuring you feel confident and inspired throughout the process. Have you ever looked at your favorite pair of socks and thought about how you could capture their essence on paper? Now’s your chance to explore that creativity!
As you journey through this article, you’ll find a step-by-step guide to sketching a simple sock, making it easy to follow along and practice. We’ll highlight the common mistakes to avoid so you can save time and frustration, and delve into techniques for adding texture and details that bring your drawings to life. Coloring your socks realistically can transform your illustration, and we’ll share effective coloring techniques to achieve that polished look. Whether you’re interested in drawing different sock styles or enhancing your artwork with dynamic designs, we’ve got you covered. Additionally, we’ll offer tips on shading and highlighting, using reference images to improve accuracy, and applying those all-important final touches that make your sock drawing truly exceptional. By the end of this guide, you’ll not only have a beautiful sock illustration but also a deeper appreciation for the art of drawing. So grab your sketchbook and pencils, and let’s embark on this creative adventure together!
Common Mistakes to Avoid When Drawing Socks
- Inaccurate Proportions: Ensure socks are proportionate to the character’s legs to maintain balance.
- Ignoring Sock Folds: Depicting folds and creases adds depth and realism, preventing socks from appearing flat.
- Missing Seams and Details: Incorporate seams, ribbing, and other details to enhance authenticity.
- Incorrect Shading: Apply consistent shading to highlight folds and curvature accurately, enhancing three-dimensionality.
- Limited Color Variation: Use different shades and highlights to avoid flat and dull-looking socks.
- Overcomplicating Design: Maintain balanced and suitable patterns to prevent distraction from the overall image.
Adding Texture and Details to Your Sock Drawing
Enhancing your sock drawing with texture and details brings realism and character to the artwork. Begin by identifying the fabric type, such as wool, cotton, or nylon, as each has distinct textures. Use fine lines and shading to depict folds and creases, giving the socks a natural appearance. Incorporate patterns like ribbing or argyle by carefully drawing repetitive shapes and lines. Adding stitching details can emphasize the construction of the socks, while highlights and shadows enhance the three-dimensional effect. To convey softness, employ cross-hatching techniques and vary line thickness. Consider the interaction of light with the material to accurately portray reflections and depth. Finally, integrating subtle color variations or gradients can further enrich the texture, making the socks look more lifelike and detailed.
- Identify the fabric type to determine appropriate textures
- Use fine lines and shading for natural-looking folds and creases
- Incorporate patterns such as ribbing or argyle with repetitive shapes
- Add stitching details to highlight construction
- Apply highlights and shadows to enhance the three-dimensional effect
- Utilize cross-hatching and varied line thickness for softness
- Consider light interaction for accurate reflections and depth
- Integrate subtle color variations or gradients to enrich texture
How to Draw Different Sock Styles Easily
To effortlessly draw various sock styles, focus on understanding the distinct features that define each type. Start by sketching the basic shape of the foot as a foundation. Then, incorporate specific elements unique to each sock style. Utilize smooth, flowing lines for a natural look and add details that highlight the sock’s characteristics. Employ shading techniques to give depth and dimension, making the socks appear realistic.
- Ankle Socks: Draw a short tube that covers just above the ankle, keeping the lines simple and minimalistic.
- Crew Socks: Extend the length to mid-calf, adding subtle ribbing or patterns around the top edge for texture.
- Knee-High Socks: Lengthen the sock to reach the knee, incorporating details like folds or decorative bands for a more intricate appearance.
- Argyle Socks: Include diamond patterns interwoven with stripes, ensuring symmetry and consistency in the design.
- Striped Socks: Use parallel lines of varying thickness and colors to create vibrant, eye-catching patterns.
- Sport Socks: Add cushioning areas and bold accents, such as reinforced toes and heels, to emphasize functionality.
By focusing on these key elements and practicing each style, you can confidently draw a wide range of socks with ease.
Using Reference Images to Improve Your Sock Drawing
Reference images are essential tools for enhancing your sock drawings by providing accurate details and inspiration. By analyzing reference photos, you can:
- Understand Proportions: Grasp the correct dimensions and shapes of different sock styles.
- Detail Accuracy: Capture textures, patterns, and knitting techniques effectively.
- Lighting and Shadows: Observe how light interacts with the fabric to create realistic shadows and highlights.
- Color Selection: Choose appropriate color palettes that reflect the true appearance of various socks.
Additionally, using reference images allows you to study the diversity of sock designs, from simple ankle socks to intricate patterned knee-highs. Integrating these observations into your drawings helps you create more lifelike and visually appealing representations. Consistently referencing images ensures that your artwork maintains a high level of realism and detail, ultimately enhancing your artistic skills in illustrating socks.
Creating Dynamic Sock Designs for Your Artwork
Designing dynamic socks involves blending creativity with practicality to produce visually appealing and comfortable footwear. Start by selecting a unique theme that reflects your artistic vision, whether it’s abstract patterns, nature-inspired motifs, or pop culture references. Utilize a vibrant color palette to make your designs stand out, ensuring the colors complement each other and enhance the overall aesthetic. Incorporate diverse patterns and textures such as stripes, polka dots, or geometric shapes to add depth and interest. Leverage design software to create high-resolution, detailed images that translate well onto fabric. Pay attention to the seamless integration of your artwork around the curved surfaces of the sock, ensuring consistency and flow. Consider the placement of key elements to highlight specific areas, like the ankle or toe, enhancing both style and functionality. Additionally, experiment with innovative techniques such as gradient fades or layered designs to create a sense of movement and energy. Finally, prototype your designs to assess their visual impact and comfort, making necessary adjustments to achieve a perfect balance between art and wearability.
- Choose a unique theme that aligns with your artistic vision
- Select a vibrant color palette for visual appeal
- Incorporate diverse patterns and textures for depth
- Use design software to create high-resolution images
- Ensure seamless integration around curved surfaces
- Strategically place key elements to enhance style and functionality
- Experiment with innovative techniques like gradients and layers
- Prototype designs to evaluate visual impact and comfort
Conclusion
Thanks for reading our comprehensive guide on drawing socks! You’ve reached the end of this article, and we hope you found the step-by-step instructions and helpful tips valuable. If you enjoyed our content, please share this post on your social media to inspire others. We’d love to hear your thoughts—comment below if you liked the post or have any requests for future tutorials. How’s our article? Your feedback means a lot to us!